I have been thinking about this next tutorial. I doubted between showing you how to close the stitches or the two basic remaining patterns. Finally I have chosen to show you first Ribbing and Seed or Moss stitch. This way, when I explain how to close the stitches, I can present you how to close any type of pattern we are knitting.
Ribbing is called this way because of the finishing of the pattern. The
resulting stitch is elastic and reversible. Both sides have the same finishing,
so we don’t have right and wrong side.
To knit this pattern knit and purl stitches must be alternated. Usually,
the same number of stitches are knitted and purled. The number of stitches is
indicated when the stitch is named. We can find “1x1 Ribbing”. In this case, we
will knit one, purl one, knit one, purl one, until the end of the row. We can
find “2x2 Ribbing”. In this case, we will knit two, purl two, knit two, purl
two, until the end of the row. We can find 3x3, 4x4. This stitch rends a
finishing with sashes. The higher the number of similar stitches together, the
wider the sash obtained will be.
In the following row, we will also alternate knit and purl stitches. All
the rows are the same. But, how do we know if we begin with knit o purl stitch?
In this pattern stitches are
knitted “as they appear”. This means that we have to knit or purl the
stitches according to how they were knitted in the previous row. The knitted
stitches are purled in the following row. The purled stitches are knitted in
the following row. It is not necessary to remember how each stitch has been
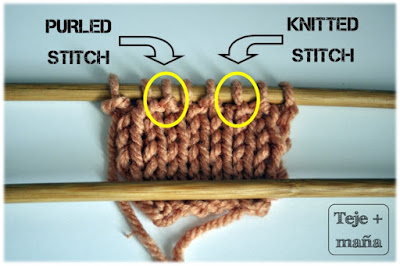
knitted. In the next photo I show you how to identify each stitch.
The stitch indicated as purled stitch, is the one you have to purl. The
stitch indicated as knitted stitch, is the one you have to knit.
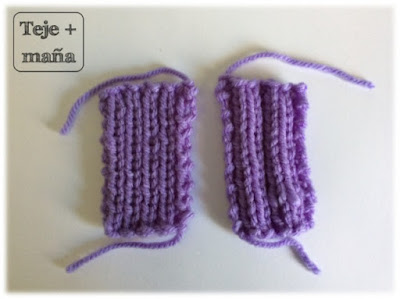
In the next photo I show you how the pattern results. The one on the left is 1x1 ribbing. The one on the right is 2x2 ribbing.
We could also have different number of purl and knit stitches, if we want
to obtain that finishing. This way the sashes have different widths. In this
case we will have two different sides.
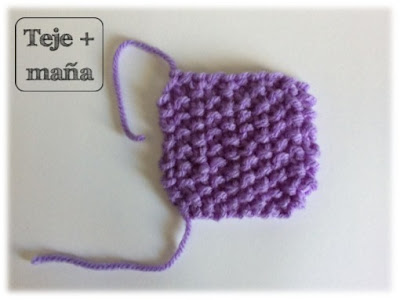
The last of the basic patterns is seed or moss stitch. This pattern is also
reversible. To knit this pattern we also have to alternate knit and purl
stitches all the rows. But then… it is knitted the same way as ribbing? No, in
this case the stitches are knitted not as they are presented, but on the
contrary. I mean, we will purl the stitches shown as knitted, and we will knit
the stitches shown as purled. And this is the finishing of seed stitch.
If you are impatient and you have already tried to knit these patterns
before finishing the entry, it is possible that you have found a question: to
knit, you have to put the yarn on the back side of the labour; to purl, you
have to put the yarn on the front side of the labour. And what happen when purl
and knit are alternated? All we have to do is to put the yarn on the front or
on the back side of the labour as we knit or purl. You can see how it is done
in the next video.
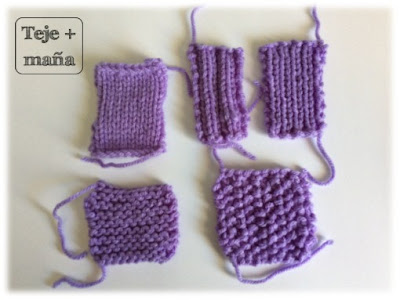
To finish this entry I’m going
to show you a photo of all the patterns we can knit up to now. With this photo
I hope the importance of knitting a gauge before beginning our garment will be
clear. All the samples in the photo are made with the same yarn and with the
same needles size. All the samples have 10 stitches and 15 rows. As you can see
the final dimensions are different depending on the stitch knitted.
Wishing the next tutorial to come to learn closing the stitches?
No hay comentarios:
Publicar un comentario